Uwagake Chidori Kagari and Kiku Design
One of the most common (though by no means only) application of Uwagake Chidori Kagari is the creation of a classic Kiku (Chrysanthemum) design. Conversely, uwagake chidori is used in many other designs besides the kiku. The pairing of them, however, is perhaps the most classical and traditional in temari-making, so a little discussion is appropriate.
The Chrysanthemum is a traditional favorite flower of Japan; it is the flower of the Royal Court and Emperor,
 cherished
along the lines of Sakura. It is believed to bestow much happiness and
long life, since it drops its petals slowly, therefore retaining its
beauty longer. Designs inspired from it are very popular in all forms of
Japanese culture, and temari is no exception. While uwagake chidori is
perhaps the most common and popular method to create it, the kiku design
can be worked by any number of stitches, stitch arrangements and
variations.
 Uwagake chidori is arguably one of the most common and classic stitches of temari-making. A detailed tutorial can be found in the TemariKai ToolKit, and a photo tutorial for a basic kiku design can be found in the Patterns library. It is formed by rows of an elongated zig zag stitch where the working thread is carried over (uwa means over) the stitches of previous rounds at the top of the zig-zag. This creates the signature inverted widening "V" of interwoven threads at the inner pole. The bottom of the rows are placed to create a downward point. While the stitch has been compared and equated to the Herringbone Stitch used in Western embroidery, it is not the same, and to do so can be misleading. Uwagake Chidori requires much smaller stitches than Herringbone, and different orientation. Herringbone is rarely, if ever, used in aligned consecutive rounds as Uwagake Chidori is. The only common factor is the zig-zag orientation.
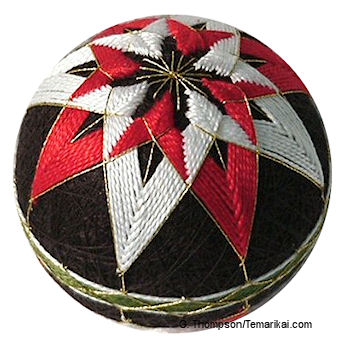
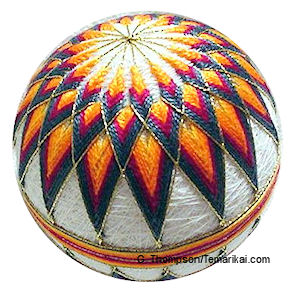
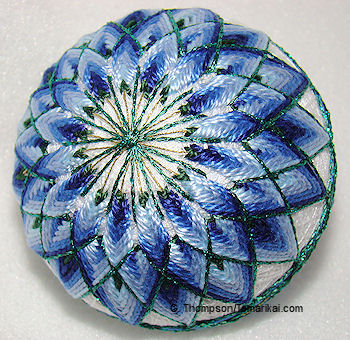
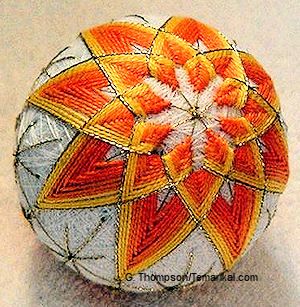
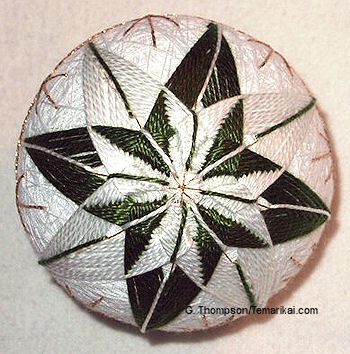
The example in the photo to the above right is a classic, straightforward 8-point kiku design. It is "8-point" because it is worked on Simple 8 Division, thus creating 8 petals. Any value of a Simple Division (i.e., any number of sections) may be used, and indeed the more divisions the more dense the design becomes. It can also be worked in the smaller faces created in 8-Combination and 10-Combination divisions, given that the mari is large enough to accommodate the design. There are an infinite number of variations and applications, limited only by your imagination. Kiku designs are accomplished by working on "sets" of lines - the above example has 2 sets of 4. Color placement on the sets will vary the outcome of the floral design. Below are some additional classic examples:
 |
 |
 |
 |
The Uwagake Chidori kiku is often the first stitch and project a new temari student may learn (it is the way I start my students off as well). Whether your first temari or you've been stitching for years, these tips can help:
The stitching points have to be evenly placed on each hemisphere of the ball after the ball is divided and marked. The top/starting points at each pole need to be evenly spaced around the pole centers; likewise the stitching points for the bottom of the points/petals need to be evenly spaced up from the obi. Training your eye for small distances of a few mm is a great help overall, and not nearly as difficult as it may seem; being able to "eye-ball" small distances is fine. This is also one of the times that the paper tape used to divide the ball can be put to further use: either further divide down a section or choose a random small distance and mark it on the strip. Use this to place the starting pole stitches. One of the small sewing gauges that has a slider on it, used for marking hems and seams in dressmaking, is also a great help. Choose a distance and set the slider; you can then check further placements against the setting. Others have used a small button or paper circle pinned to the center point (but you have to be sure it is in the exact center!) as a boundary to place the stitches. By far though, the best thing you can do is train your eye, and then perhaps check yourself with measuring.
The lower, bottom points of each petal likewise need to be placed accurately. When placing the starting points for the bottom stitches of Uwagake Chidori, it is much easier and will give a better outcome to measure UP from the equator, rather than DOWN from the pole. This will help to negate or at least dilute any irregularities in the roundness of the mari and/or division and marking. There are many ways to measure the same distance up from the obi - by eye, paper strip, tape measure, sewing gauge... just be sure that the points are relative to the equator and not the pole.
Remember that the traditional and preferred way to determine distances in temari-making is "relative", rather than "absolute" - that is, distances are described in relation to something on the mari marking rather than measuring a specific distance with a ruler. For example, the bottom point of Uwagake Chidori would be placed "1/2 of the distance between the equator and pole" rather than say, "2cm up from the equator". For small distances of less than 1cm, mm measurements will often be used, but it's not uncommon to see small distance described in terms of "needle widths" - since the average diameter of a needle is usually about 1mm. This becomes even more important when you realize that it is relative placement that allow temari patterns to be "translated" to different size mari. If the bottom points are placed 1/3 of the distance from equator to pole, up from the equator, the outcome on a 23cm temari will look the same as what is stitched using the same placement on a 30cm mari. However, something like "3cm from the equator" is going to look a lot different on a 23cm ball than on a 30cm ball (and at times you may find that absolute measurements just plain don't work on a mari size other than that specified in the pattern).
Stretch the points, as Sarah R. and Sue H. shared with us from the very beginning of TalkTemari, as they learned from Ozaki Sensei when they took her classes in Tokyo. The second and following rounds on the bottom points of Uwagake Chidori need to be placed a distance below the previous round, in order to give space for the volume and loft of the thread to turn the corner and bend back on itself, in a smooth and sharp point. This usually amounts to about 2 mm (or the size of the diameter of the thread) for pearl cotton #5, but varies according to the gauge of the thread (larger the thread, the more the point needs to be stretched). The angle of the point also needs to be considered: the tighter the angle/corner (that is, smaller), the longer the stretch is needed. If you are not "stretching" the stitch enough, the points will not lay sharp, will be rounded and garbled, and the threads will not lay smoothly along each other.
Lay the thread, then take the stitch to keep it there. This applies not only to Uwagake Chidori and kiku designs, but all temari stitching. Prior to taking a stitch, place your thread where it needs to lay; that is where you need to place your stitch.
Use the eye of your needle to stroke the interwoven threads between the points in a downward direction, in the area between the upper stitches. This will continue to open enough room for you to stitch. The upper stitches continue to get wider as the work downward. Be sure to allow this to happen for the proper effect and outcome of the stitch.
This
is a TemariKai.com Printable Page; © 2014, all rights reserved.
Right click to print one copy for personal use.
Last updated 1/2014 © 1998 - 2014 TemariKai.com, G. Thompson/PuffinStuff, Inc.
