
8-Combination Division: Hattitobun no Kumiawase
Hattitobun no kumiawase - the 8-Combination (also referred to as Combination 8, or C8) is a one of the standard divisions in temari making. Mastering the C8 is the second major step in learning temari divisions (after simple divisions). The C8 builds off of a Simple 8 so mastering simple divisions is a must before moving on to the combination divisions, but a wonderful world opens up to you when you add combination divides to your
 repertoire.
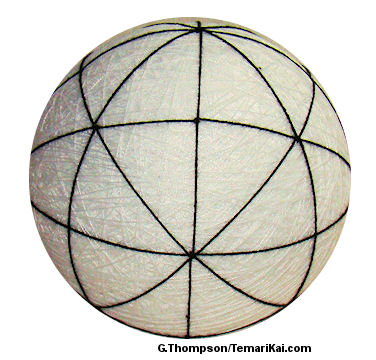
The C8 Division begins with marking a Simple 8. Remember, the definition of a combination division is "combining on", or adding on, more centers of the same starting value, symmetrically arranged around the ball. To create a Combination 8, 4 more diagonal marking lines will be added which will form 4 more 8-point centers around the equator. The outline shape of these 6 centers will be a square. As these centers are formed, there will be additional major faces appearing that become integral players in stitching C8 designs: 8 6-point triangles, and 12 4-point diamonds.
Begin by dividing and marking a Simple 8 ball. Keep handy the paper strip, or a tape measure, and your marking pins. Usually the marking is done in metallic or design thread; pearl cotton in contrasting colors are used here for demonstration.
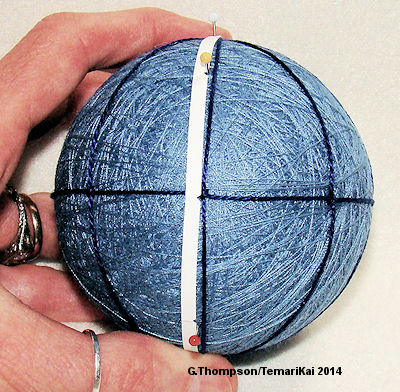 |
Pin the marking strip back to the NP. Align it along a marking line, and place pins in the 1/2-way points between the poles and equator in both hemispheres. This is 1/8th of the circumference, so you can use the 1/8th notches on the strip. Alternately, a measuring tape can be used to determine 1/2 the absolute distance from equator to pole. |
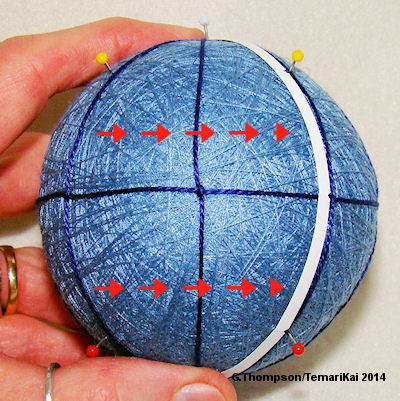 |
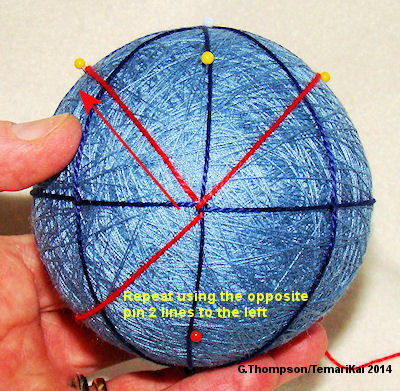
 Move the strip (without unpinning it) 2 lines to the right.Continue around the mari, moving 2 lines to the right, until you have placed 4 sets of pins on 4 alternate lines of the Simple 8 marking. |
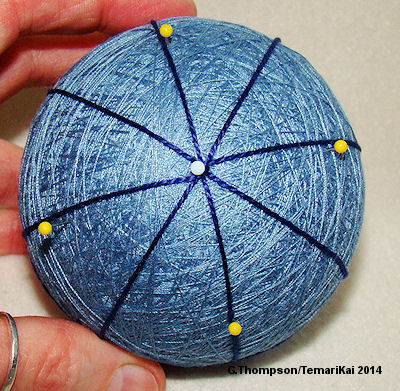 |
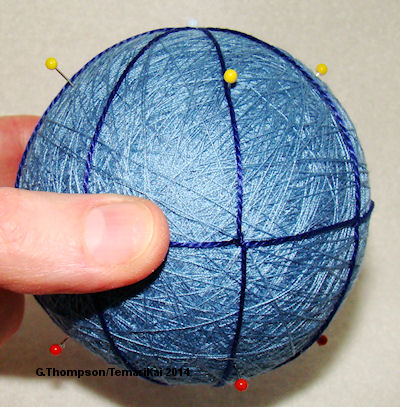
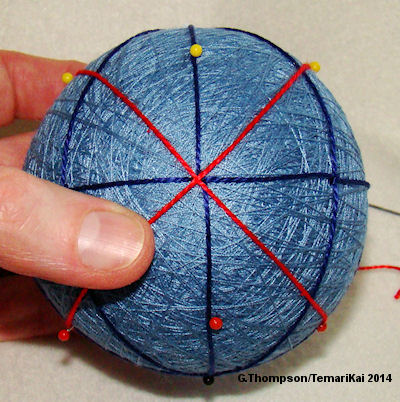
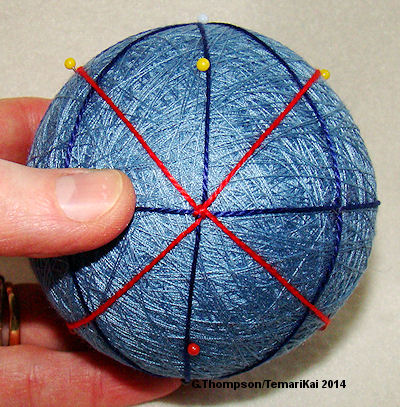
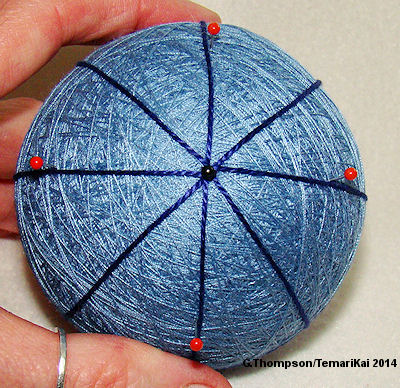 When viewed from the poles, it should appear as in the photos. Remove the marking strip from the mari. |
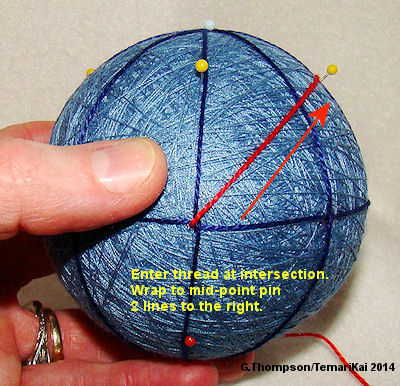 |
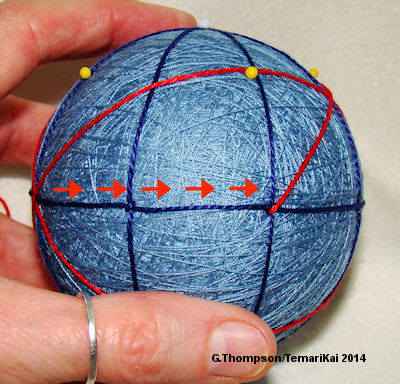
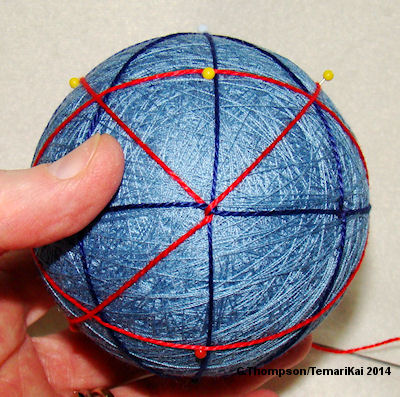
 Measure off 2 wraps plus enough to enter and exit of the marking thread. Anchor the thread and bring it up at the intersection of a vertical line and equator, on a line that has the marking pins in it. Continue to the opposite equator intersection from where you began. Note that the wrap must go around the cull circumference of the ball. |
 |
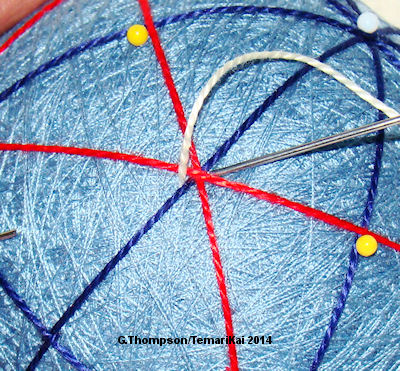
 Complete the wrap, then take a small stitch to direct the thread to the opposite mid-point pin, on the left. Notice on the opposite equator/vertical line intersection, an 8-point center has been created. |
 |
Return to the starting point, anchor and exit the thread. This intersection has now become an 8-point center as well. |
 |
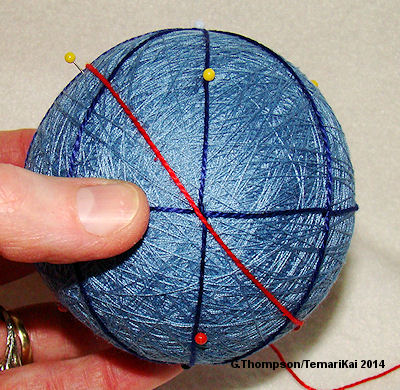
 Measure off 2 wraps of thread plus enough to enter and exit the thread. Move 2 marking lines to the right. Anchor the thread and enter it at the equator/vertical line intersection. Repeat the above steps for these 2 wraps. Note that this second set intersects with the first on the lines without marking pins. Return to the starting point, anchor and exit the thread. |
 |
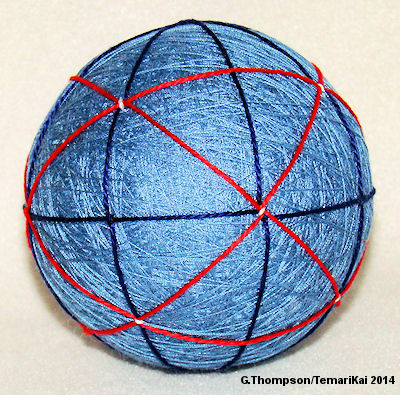 The intersections of the additional marking lines form 6-point intersections in the middle of the triangles formed by the division. These points are also the corners of the 4 squares formed around the 8-point centers (of which there are now 6). Tack the 6-point centers, as well as any 8-point centers that are as yet not. |
This
is a TemariKai.com Printable Page; © 2014, all rights reserved.
Right click to print one copy for personal use.
Last updated 1/2014 © 1998 - 2014 TemariKai.com, G. Thompson/PuffinStuff, Inc.