Simple Division: Tanjyun Toubun
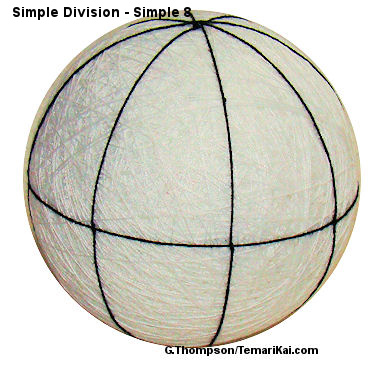
Tanjyun toubun, or Simple Division, is the basis of almost all of temari making. Traditionally, divisions are created by using a marking strip and relational geometry to segment the ball in very specific ways according to the laws of nature (physics & geometry). The foundation of all divisions is the Simple (or Vertical) Division, one of the 3 standard divisions. By
 tradition, a
paper strip using relational geometry is the only tool needed to
accomplish this.
 The Simple division is the easiest of the standard divisions. It divides the mari into wedges (any number; this example is for a Simple 8) from north to south (like an orange), with a perpendicular equator at the mid-line. In addition to being used as is to create designs, it is also the division that the other two standard divisions use as a foundation. The north and south poles are achieved, and the equator identified. Thread lines are then wrapped around the full circumference of the mari, going from north pole to equator to south pole to equator, back to the north pole. This is repeated the required number of times for the needed Simple # Division. The equator is always laid down in a Simple Division unless the pattern states otherwise.
It will help to be familiar with the info on the Dividing Help/Tips and the Marking Help/Tips pages. Note that while this example is for a Simple 8, this process of using a marking strip and relational geometry is used to create any simple division. Any value can be worked by changing the number of segments the marking strip is divided into when sectioning the equator. Either fold it into the required number, or measure and mark (helpful for odd numbers).
The first section of this tutorial covers using a marking strip to divide the mari; the second section covers placing the marking threads.
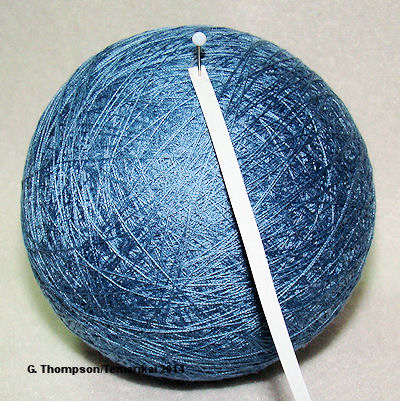 |
Choose any location on the mari to be the north pole. Pin the end of the marking strip to the ball; place the pin close to the end edge but far enough in that it is secure. Use a white pin, since this is the north pole. |
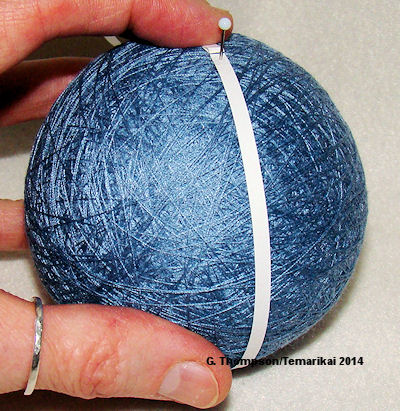 |
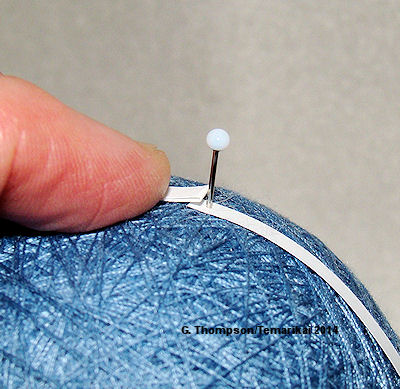 Wrap the strip around the fullest part of the mari - that is, the full circumference. Bring the strip back around to the north pole, and fold it to this circumference length. Be sure to abut the fold to the NP pin, NOT the end of the strip. |
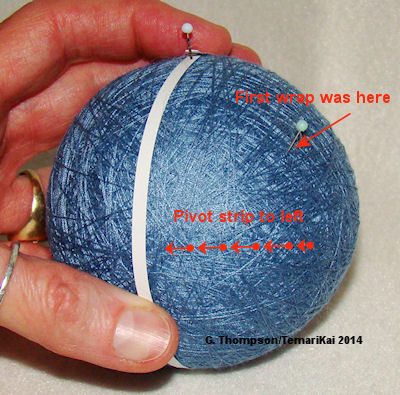 |
Allow the strip to move freely around the NP pin (DO NOT
remove the pin until instructed to), and pivot it to the left a
random distance from where the strip was first wrapped around
the mari. Repeat wrapping the strip around the full
circumference of the ball, and check to see that the fold again
meets the NP pin. If it is off more than about 3 mm, start over
(remove pin, use a new strip and choose a new location for the
NP. If things are still off, the ball is not round, don't
continue using it). As long as things are ok, repeat the check
one more time, and if all ok, then cut the strip to the length
determined by the fold. |
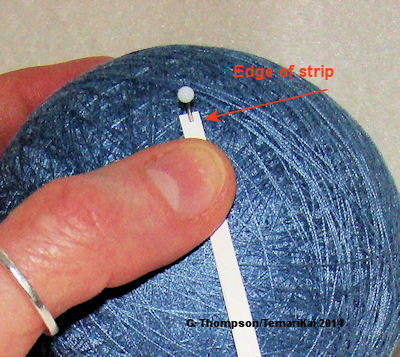 |
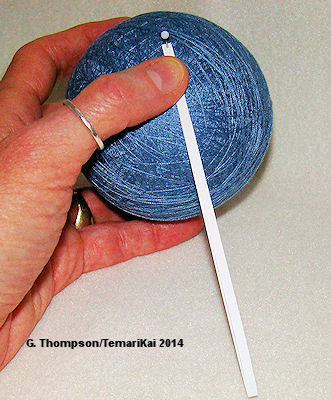 Fold the end of the strip back up to the NP, so that the end of the strip abuts the pin. Crease the fold in the opposite end of the strip |
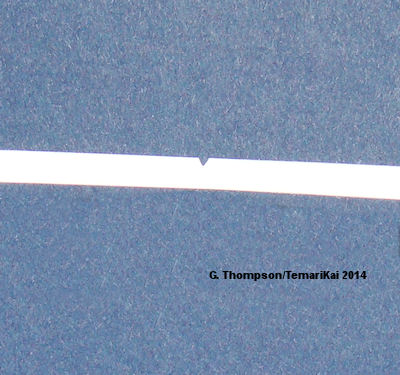 |
Cut a small notch into the edge of the strip at the fold. This
is best done with the strip folded, and just nipping off the
corner of the fold BUT - be sure to keep it small. Do not cut
deeply into the strip or it will become too fragile to use.
Likewise, do not cut a very wide notch, because it causes the
markings to be less accurate. Always be sure to cut all notches
on the same side of the strip, as well. If desired, a pencil
mark can be placed on the strip as well (or in lieu of, but
notches work better). |
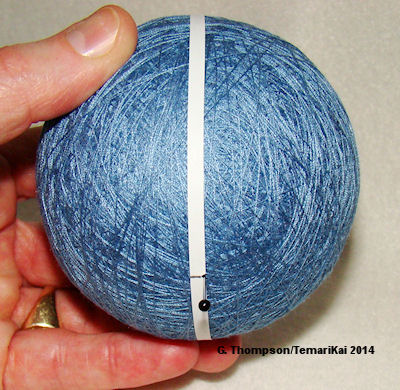 |
Wrap the strip back around the full circumference of the ball, and place a black pin at the notch to mark the south pole.When placing pins, be sure to align them against the edge of the strip, and place them in the middle of the "V" opening of the notch in the edge of the strip. This needs to be consistent, all the time, no matter what. |
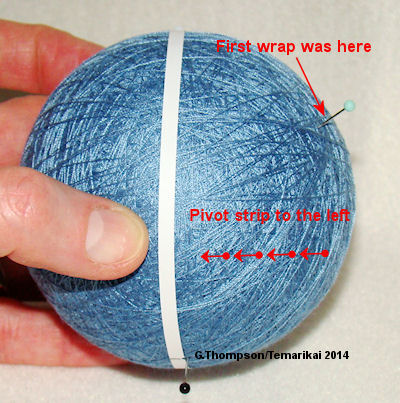 |
Just as when checking the length around the circumference in the beginning, this is done again to check the accuracy of the SP placement. Notice the green pin to the right in the photo at left; this is the original wrap of the strip around the ball. Let the strip dangle freely, and pivot it a bit around the pin, to the left. Reposition the strip around the ball and check to see that the SP pin is in the notch. If not, adjust it. Repeat this process 1-2 more times. All checks should be accurate now, to within 1-2 mm. If not, the ball is not round or there is another problem; do not continue with this ball and strip. |
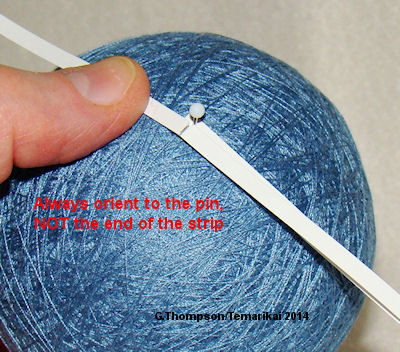 |
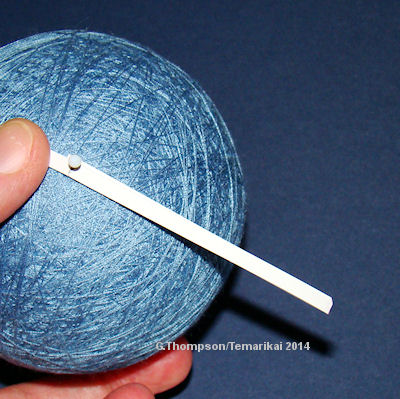 Bring the SP notch up to the NP pin, and fold the strip again. Be sure to match the notch and the pin, NOT the end of the strip, at the NP. Place a sharp crease in the strip when folding, and trim out another notch. |
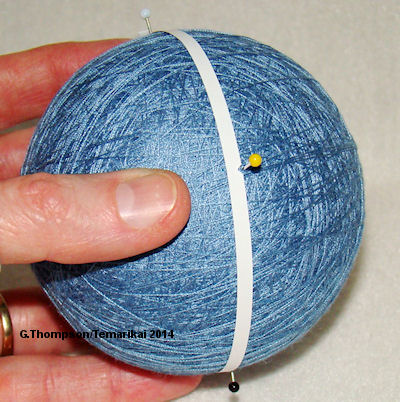 |
Unfold the strip and wrap it around the mari, aligning the SP
notch with the SP pin. Using any other color pin except white or
black (these colors are always reserved for NP and SP,
respectively), place a pin in the notch. This begins locating
the equator line. This is only to locate the line, not determine
division width. |
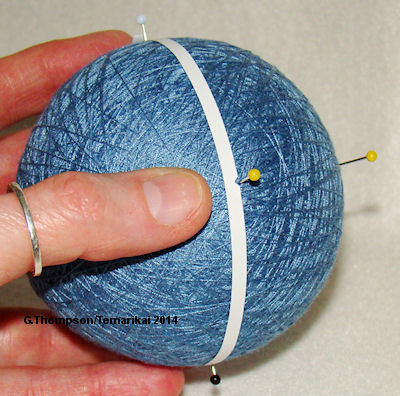 |
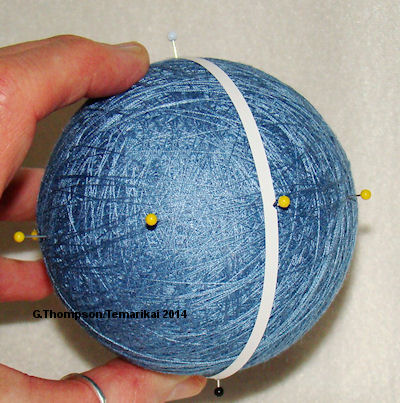 Allow the strip to dangle freely and pivot it around the NP pin to another location; repeat the pinning at the notch. Again, the distance at this time is not important. Repeat around the ball, placing 5 or 6 +/- pins around the equator line. |
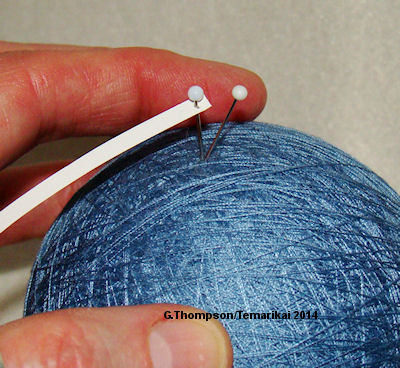 |
Very carefully, lift the strip up along the shaft of the NP pin; gently insert another white pin along side the original one, going into the same location on the mari. As you insert the new one, remove the old one (that also has the strip on it). The idea is to replace the new pin in the exact same place as the first one. Everything is relative, literally; this strip and the locations that have been pinned are all dependent upon that first NP pin placement on the mari. If any of these change, the process needs to start over. |
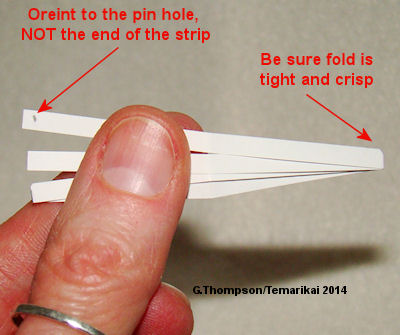 |
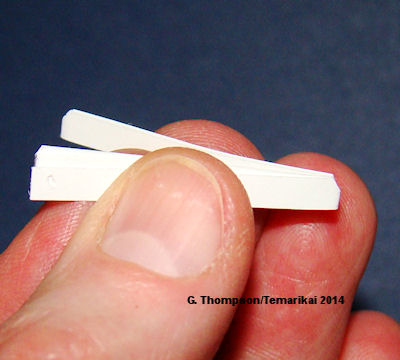
Refold the strip back into half and then again into quarters. Always be sure that the folds are trim and tight without the strip slipping around. Trim the 1/4 notch to catch all layers (only one was done before when it was pinned on the ball). Always remember to orient to the pin hole, NOT the end of the strip, at the NP end. |
 |
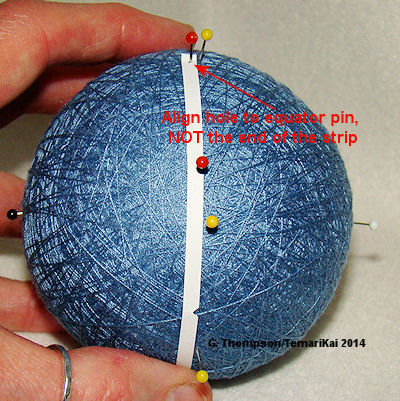
Again being sure to hold all layers tight so there is no slipping, fold the strip in half again - which will yield 1/8ths overall. Cut notches in these new folds, following the same precautions as above. |
 |
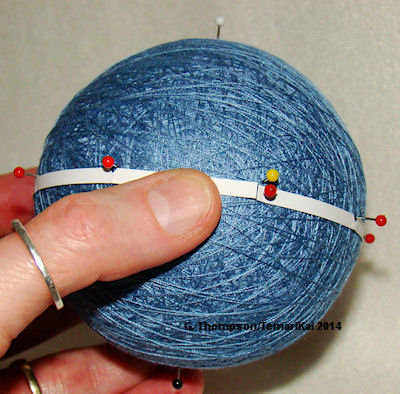
Turn the mari so that the NP pin is to the right, and the equator line pins are running top to bottom as you look at it. Place the pin hole of the strip right next to one of the equator line pins, so that the edge of the strip abuts the pin as well. Wrap the strip around the ball so the edge of the strip is right next to the equator pins. |
 |
Replace the equator line pins with a pin in each notch along the paper strip. Again, remember to place the pins along the edge of the strip, and in the middle of the top of the open "V" of the notch. |
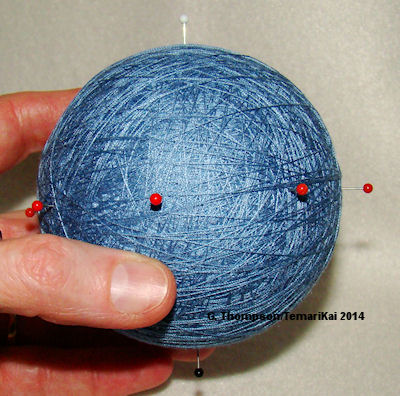 |
Remove the pin holding the strip to the mari. This is now a
pin-marked mari ready for division/marking threads. Note the NP,
SP, and equator, all evenly marked without using anythings other
than the strip. If you hold the ball gently with your fingertips
on the NP and SP pins, and gently spin it, the equator line
should pass evenly and straight. Note that all of the pins have
been placed "in relation to" the NP - the SP is 1/2 of the
circumference away, and the equator is 1/4 of the circumference
away from the NP; no absolute measurements using a ruler were
used. This is relational geometry. Do not discard the paper strip until you have finished stitching the design; you may need it. Continue to the second step to place the marking threads. |
This
is a TemariKai.com Printable Page; © 2014, all rights reserved.
Right click to print one copy for personal use.
Last updated 1/2014 © 1998 - 2014 TemariKai.com, G. Thompson/PuffinStuff, Inc.
