
TemariKai ToolKit - Shitagake Chidori Kagari 下 掛け千鳥かがり
Shitagake Chidori literally translates to shita, under; gake, stitch; chidori, zig-zag. It is a particular application of the basic Chidori
 Kagari worked in
repeating rounds or rows, such that the working thread of the second or
higher round remains under
those of the previous rounds. As opposed to uwagake
chidori, where the working thread is taken over one or more of the
previous rounds, shitagake chidori will not interact with previous
rows. What marking lines or sets of marking lines are worked on,
and whether there are any variations from the basic stitch will be
contained in the directions for the Temari design you are making. The
only thing needed to learn is the basic stitch execution.
Kagari worked in
repeating rounds or rows, such that the working thread of the second or
higher round remains under
those of the previous rounds. As opposed to uwagake
chidori, where the working thread is taken over one or more of the
previous rounds, shitagake chidori will not interact with previous
rows. What marking lines or sets of marking lines are worked on,
and whether there are any variations from the basic stitch will be
contained in the directions for the Temari design you are making. The
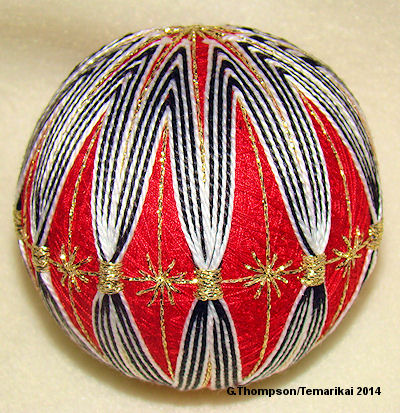
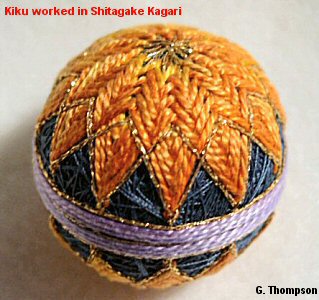
only thing needed to learn is the basic stitch execution. Shitagake chidori requires a bit of patience to work, but it can create some stunning results well worth the effort. This is one instance where, on the upper stitch locations, there are points, but they don't require application of stretching the points. The the stitches are worked in free space under those of previous rounds. Rather, the goal is to keep the placements snug. However, the lower points do require stretching. The example shown in the photo to the right also applies jyouge douji style, rather than a kiku design, so there are no lower points.
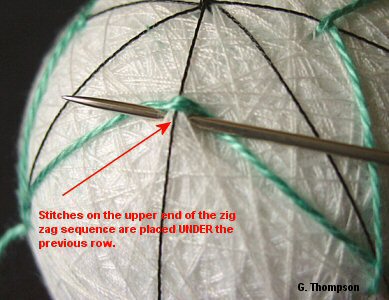 |
Anchor a working length of thread and enter it to the left of a marking line. Work one round of chidori kagari around the pole. Beginning with the second and all further rows, the upper stitches of the chidori are placed snugly under that of the previous round. As seen in the photo, the upper stitch of the chidori is placed very closely under that of the previous row. If needed, use a tekobari or pin to raise the thread of the previous row to be able to tuck the stitch in snugly, but don't pull the original orientation out of alignment. |
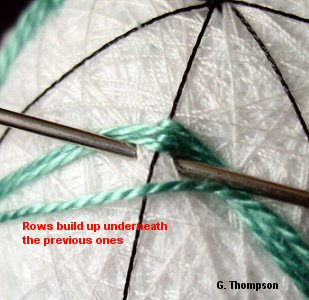 |
Work the ensuing rounds in the same manner. The best outcome is achieved by paying attention to tucking that stitch in as closely under the previous rows as possible. If you have difficulty getting even stitches while holding the previous rows out of the way, use pins to hold them. However, don't push the previous rows up so far as to disrupt their placing when the stitching is complete. Check your work as you go. |
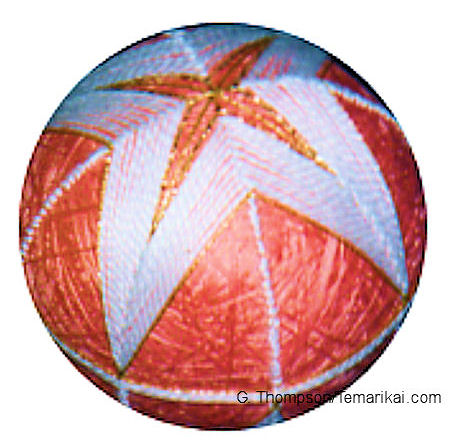 |
 These examples shows shitagake chidori kagari in common form. The bottom points of the chidori have been stretched as usually required. The photo to the right is worked on a small mari using 2 sets of marking lines to result in a more dense appearance. |
This
is a TemariKai.com Printable Page; © 2014, all rights reserved.
Right click to print one copy for personal use.
Last updated 11/2015 © 1998 - 2015 G. Thompson/PuffinStuff, Inc.