
TemariKai ToolKit - Mitsubane Kikkou 三 つ羽根亀甲かがり
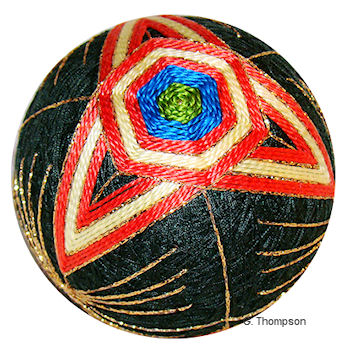
Mitsubane kikkou is commonly referred to as tri-wing and hexagon; however, it gets there via a bit of a convoluted route. Mitsubane translates to three and leaf (which has been morphed to point) Kikkou means tortoise, and harkens back to the old Kanji characters
 used
to describe it. The center of a tortoise's shell is hexagonal. Kanji is
a pictorial-based system, so the symbol for six sides became that of the
object in nature that had six sides on its shell. The temari stitch is a
center hexagon with 3 points radiating from it. Mistubane Kikkou is one
of the 4 stitching skills required for Honka
Certification in the JTA.
used
to describe it. The center of a tortoise's shell is hexagonal. Kanji is
a pictorial-based system, so the symbol for six sides became that of the
object in nature that had six sides on its shell. The temari stitch is a
center hexagon with 3 points radiating from it. Mistubane Kikkou is one
of the 4 stitching skills required for Honka
Certification in the JTA.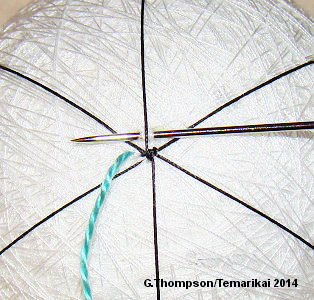 |
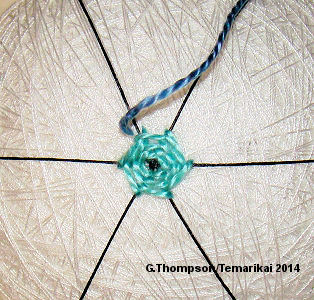
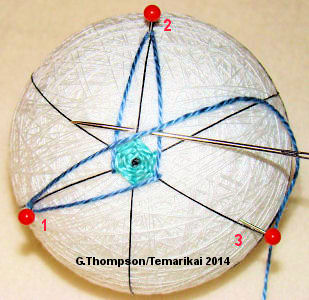
Anchor a thread on a 6-point center, coming up to the left of a marking line about 1 thread width out from center and away from the marking line. |
 |
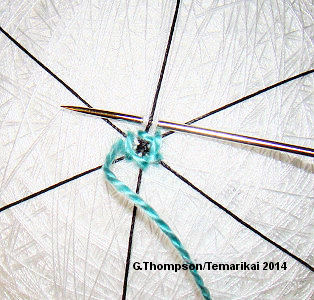
Working clockwise, take a stitch on each marking line around, placing the stitches about 1 thread width out from the center. |
 |
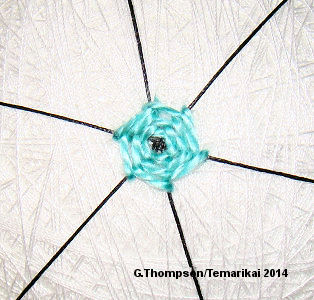 Continue around to the starting point.Repeat around for the required number of rows. It may help to place a pin on the starting line to make it easier to know when a round is complete. Be sure to keep each row distinct and clear; it should not "spiral" out from the center but rather be successive rounds building up around the perimeter. |
 |
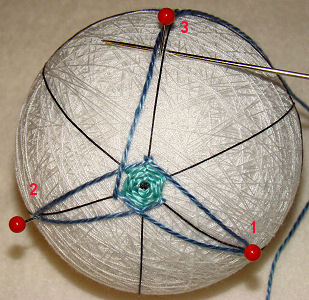
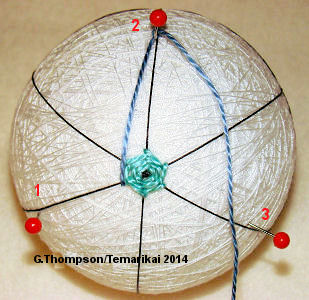 Anchor a working thread at one corner of the hexagon as shown to the left. Place pins on 3 alternate lines, beginning with the line the thread is anchored on; place 1/2 between pole and equator or as specified in pattern. Following sequence shown to the right, carry the the thread along the side of the hexagon, across the next line, and to Pin 2. Turn the ball so that Pine 2 is at 12 o'clock; take a stitch on the far side of Pin 2. |
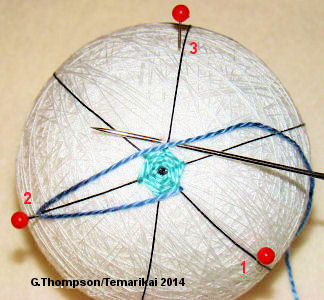 |
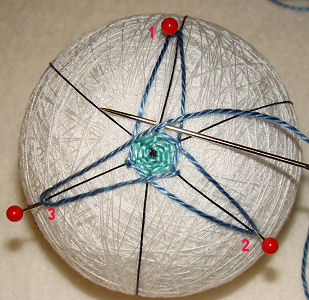
 Turn the ball so that Pin 3 is at 12 o'clock; carry the thread across next line, along side of hexagon, and take a stitch on Line 3 at corner of hexagon. Turn the ball so Pin 1 is at 12 o'clock, carry thread along side of hexagon, across next marking line, and to Pin 1. Take a stitch on the far side of Pin 1. |
 |
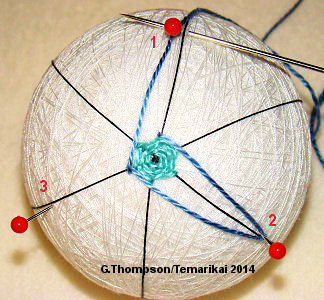
Turn the mari again so that Pin 2 is at 12 o'clock; carry the
thread across the next marking line, along the side of the
hexagon, and take a stitch at the corner of the hexagon on line
2. |
 |
Turn again so that Pin 3 is at 12 o'clock; carry the thread
from the last stitch in the same manner and take a stitch on the
far side of Pin 3. |
 |
Turn the ball yet again so that Pin1 is at 12o'clock. Take a
stitch at the corner of the hexagon. This completes a full round of the mitsubane. Remove the marking pins. |
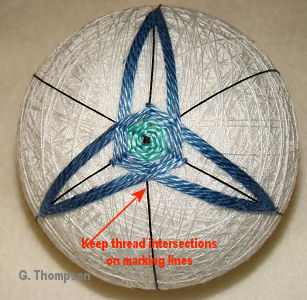 |
Continue stitching in the same manner. Note that all stitches are on point lines; if you are taking a stitch on a different line, something's wrong. Remember to stretch the points. Take care when working to keep the thread crossovers aligned on the alternate marking lines. The mitsubane will emerge in kousa style (as opposed to the nejiri style in Nejiri Mitsubane). Any number of rounds can be used in the hexagon center as well as the mitsubane; the length of the points can be varied as well. |
This is a TemariKai.com Printable Page; © 2014, all rights reserved. Right click to print one copy for personal use.
Last updated 11/2015 © 1998 - 2014 G. Thompson/PuffinStuff, Inc.