TemariKai ToolKit - Hoshi 星 かがり
Hoshi means star, and in regard to temari, a 5-point star. For anyone that can remember back to grade school days, the path is the
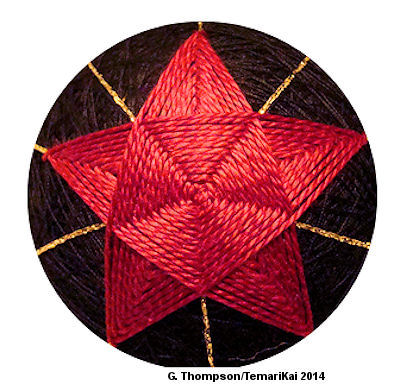 same as how
most of us learned how to draw stars way back then. Given that hoshi
kagari is a 5-point design, it requires a multiple of 5 marking lines to
work. These can be on a simple 5
or 10 division, or the pentagons of a 10-combination,
as examples. It can be worked from a tight center outward so that it is
fully solid, as shown in the photo to the right. It can be worked with
an open center as in the stitching example. Hoshi kagari is also very
adaptable to sakasa variation.
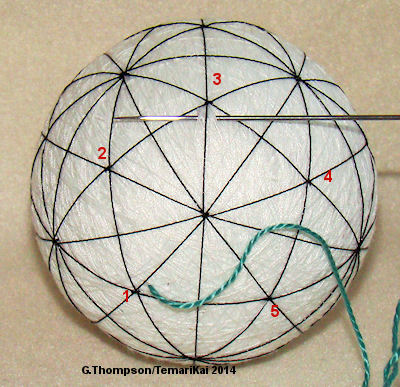
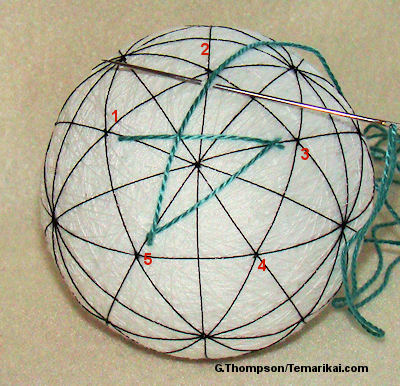
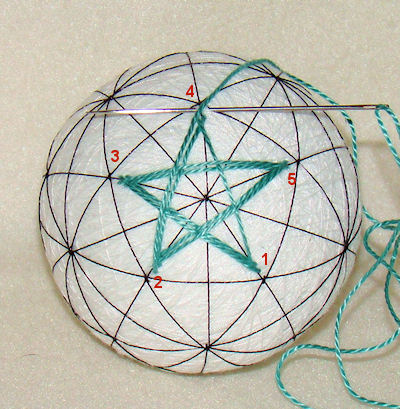
 Note that the stitching points are numbered 1-5, but they are labels, not the path. The path is 1-3-5-2-4-1.
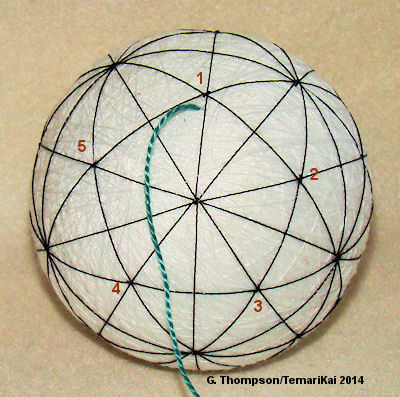 |
Enter a working length of thread and bring it up to the left of the marking line at Point 1. |
 |
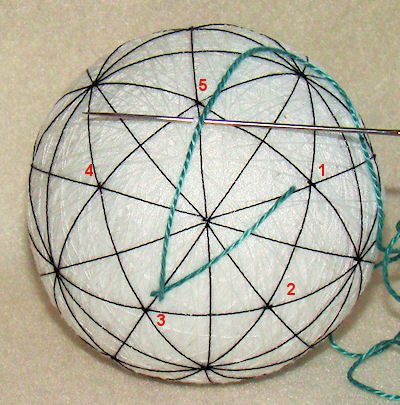 Turn
the ball so that Point 3 is at 12 o'clock; skip Point 2 and take
a stitch at Point 3. Turn the ball again so that Point 5 is at
12 o'clock; skip Point 4 and take a stitch at Point 5. Turn
the ball so that Point 3 is at 12 o'clock; skip Point 2 and take
a stitch at Point 3. Turn the ball again so that Point 5 is at
12 o'clock; skip Point 4 and take a stitch at Point 5. |
 |
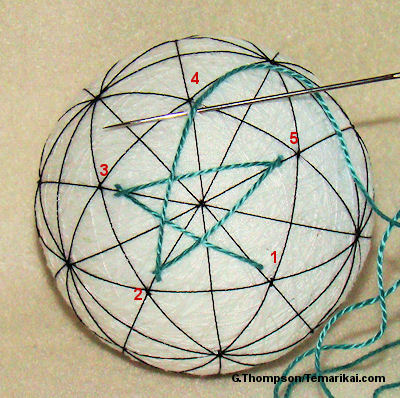 Turn the ball so that Point 2 is at 12 o'clock; skip Point 1 and take a stitch at Point 2.Turn the ball again so that Point 4 is at 12 o'clock; skip Point 3 and take a stitch at Point 4. |
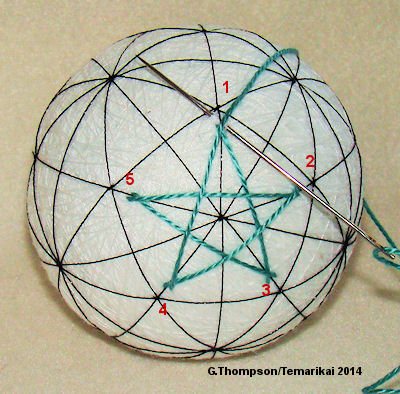 |
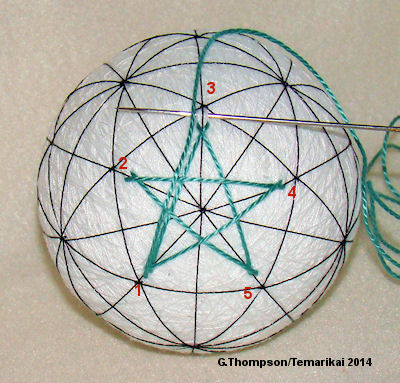 Turn the ball once again so that Point 1 is at 12 o'clock. Skip Point 5 and take a stitch at Point 1, which is completes the round. Note the angle of the needle, so that it exits the thread in position to begin the next round. Repeat the stitching cycle, always turning the ball so that the point being stitched is at 12 o'clock. |
 |
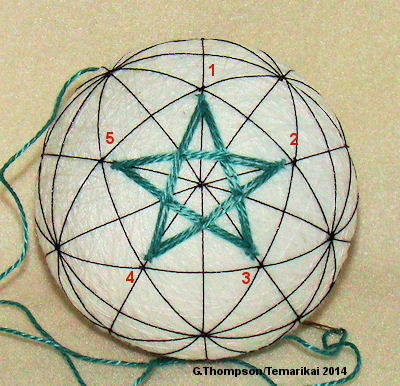 The design will work outward from the first round. Be sure to stretch the points so that they lay sharp and clean. If the element was started tight at the center of the pole, it will be a solid pentagon center as shown in the top photo example. If not, there will be an open center as shown here. Either way, thread should be groomed and placed properly so that the pentagon is regular and plumb. |
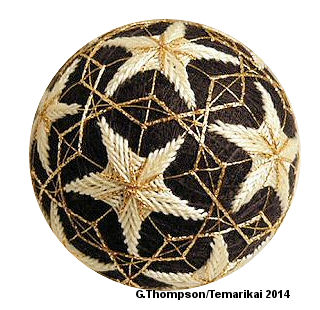 |
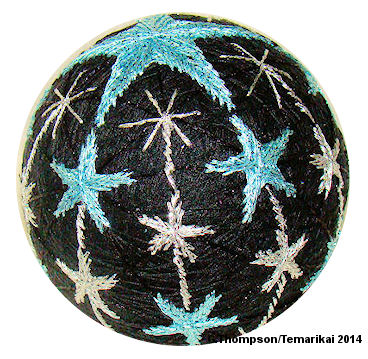 Hoshi kagari lends itself very well to a sakasa variation. While these are both closed (filled) examples, adaptations leaving open space work well, also. |
This
is a TemariKai.com Printable Page; © 2014, all rights reserved.
Right click to print one copy for personal use.
Last updated 11/2015 1998 - 2014 G. Thompson/PuffinStuff, Inc.
