6 Combination Marking (8 6-point centers, 6 8-point centers) (S6)
This can be a confusing marking due to its name - the biggest thing to remember is to not confuse it as being a Standard Division
 such as a
C8 or C10 - it's not. While the method to construct it is similar to how
the divisions are worked, the resulting marking does not meet the
geometric requirements of a division.
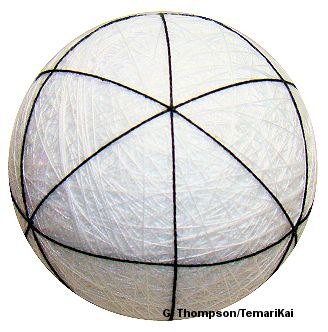
 Even though the C6 is a marked by starting with a simple 6 and adding more marking lines that go around the full circumference of the mari, the north-south symmetry is not maintained in the process. A line drawn through the center of the ball from one center does not emerge on the opposite side through an opposite center; the faces created are not unique and independent. The shapes created around the centers of the C8 and C10 combinations are unique individuals, in that they are adjacent to each other but independent of each other. Any one of them (the squares around the 8 point centers and the pentagons around the 10 point centers) stand on their own, sharing adjacent sides but they do not extend into each other. A wedge beginning at the perimeter of the face tapering to a point in the center of the ball could be removed without interrupting the others. They do not encroach or overlap into each other. The triangles of the C6 do not exist in this manner, they are co-dependent. One cannot be removed without ripping apart its neighbors. The marking does appear in a few Japanese books, but it is not instructed as a standard division. It's rather a common extra marking that does appear frequently in temari design.
 |
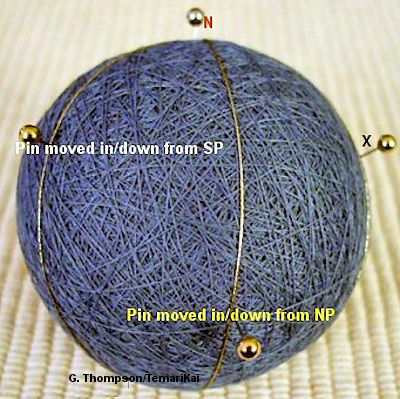
Start with working a Simple
6 but do not mark the equator. Pins will be placed on
alternate marking lines according to the following distance from
the poles: 1/6th of the circumference + 3/100ths of the
circumference (just as in a C10 the "couple of 100ths" is
required for things to work). For example: The mari in the photo to the left measures 24.5cm circumference. 1/6th of this value = 4.1; 1/100 = 0.24 so 3 times this is 0.72 (round off to .7). Therefore, the pin distance is 4.1 + 0.7 = 4.8cm. On alternate lines, place a pin this distance from the pole. It results in six pins forming a wide zigzag around the center of the mari. |
 |
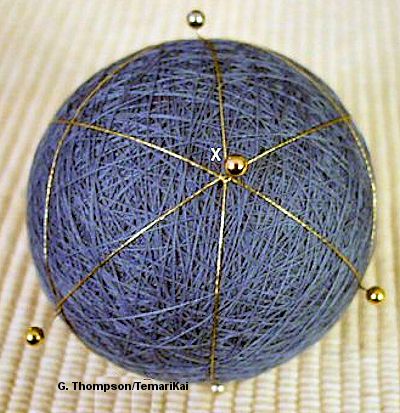
Choose one of the "new" pins, and consider it to be a pole. In
this example it's Pin X. There will be 2 other pairs of pins
spaced opposite each other that will be used to add the next
threads. Measure off two wraps of thread, start at Pin X and add
a full circumference marking line using one of the two pairs of
pins. Return to Pin X and wrap again using the other pair. There
will now be six lines radiating out from Pin X (see photo
to the left). |
 |
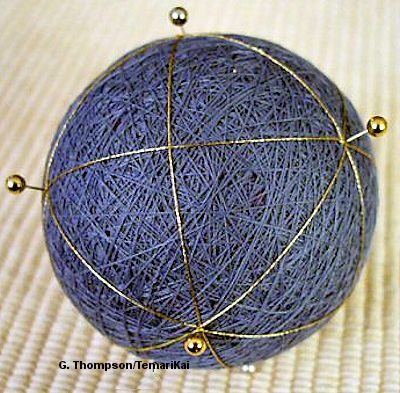
Measure off one more wrap of marking thread, and locate the remaining pin that has only two lines radiating from it. Complete the marking by wrapping the last marking line around from pin to pin on this pair (photo to left). Tack centers after grooming in place. |
 |
This marking results in 8 6-point faces and 6 8-point faces in addition to further smaller sections |
This
is a TemariKai.com Printable Page; © 2015, all rights reserved.
Right click to print one copy for personal use.
Last updated 1/2015 © 1998 - 2015 TemariKai.com, G. Thompson/PuffinStuff, Inc.
