TemariKai ToolKit - Tsumu Kagari つ むかがり
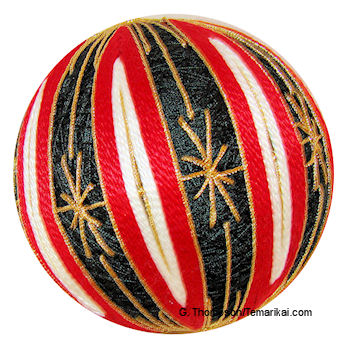
Tsumu translates to spindle. The stitch is started by anchoring the inner starting points with 2 keeper pins. The placement of the pins will
 determine how
long and narrow, or short and wide, the spindle becomes. Tsumu kagari
can be used alone or added into other designs. They can be interwoven,
interlocked, layered - it's a versatile element. Best results are gotten
when attention is paid to a few details but it is an easy element to
stitch. They can be worked vertically, horizontally or on an angle.
determine how
long and narrow, or short and wide, the spindle becomes. Tsumu kagari
can be used alone or added into other designs. They can be interwoven,
interlocked, layered - it's a versatile element. Best results are gotten
when attention is paid to a few details but it is an easy element to
stitch. They can be worked vertically, horizontally or on an angle.It may help to keep a north and south pole pin in place to stay oriented while Tsumu is worked.
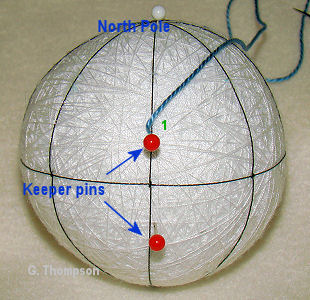 |
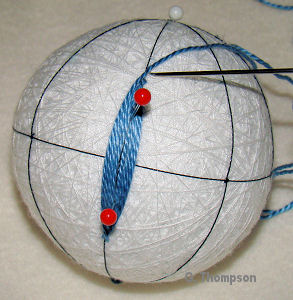
Begin by placing 2 keeper pins. Usually they are placed on a marking line (though this can be varied), and they are placed equidistant from where the center of the spindle will be. Many spindles are worked vertically, but however they are placed in the design, the spindle has a top and a bottom as you are working it. Tsumu will expand outward from the pins. |
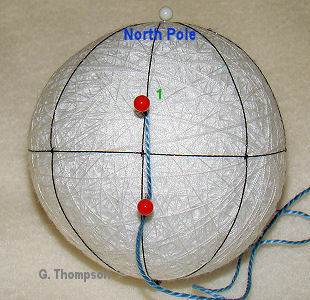 |
With the north pole facing up, enter and anchor a thread, and bring it up just a bit above the upper pin. Then, carry the thread along the right side of the marking line down to the bottom pin. |
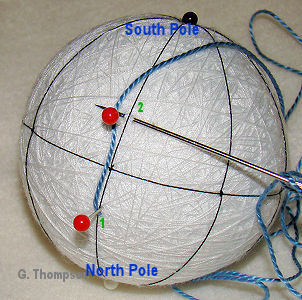 |
Turn the mari upside down and take a stitch just at the bottom pin - which is now the top since the mari was turned. Notice the placement of the stitch... about 1mm away from the pin. Snug the thread to normal tension as you complete the stitch, but be careful to not use too tight a tension so that as you work the threads cannot lie flat, or pull the marking pins out of alignment. |
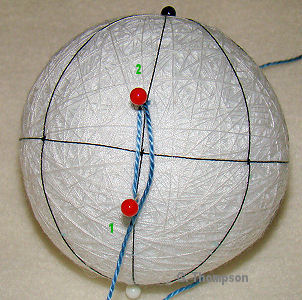 |
Carry the thread along the right side of the marking line back to the first pin (original top pin at the north pole) |
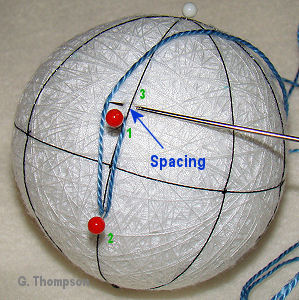 |
Turn the mari again so the north pole pin is facing up. Take a stitch above the placement of the first stitch where you started. Notice that the stitch is placed about 2 mm above the previous one - not right on top of it. The reason for allowing this extra space is to allow for the volume of the thread as the point of the spindle is turned. This concept is stretching the point. It insures sharp, crisp points and that the threads of the design will lie flat, and remain in place. |
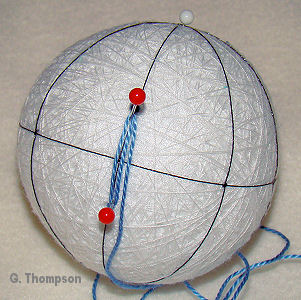 |
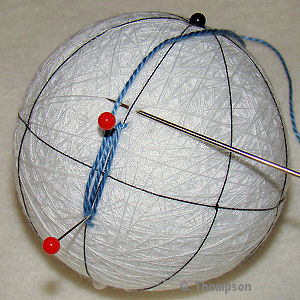 Carry the thread along the right side of the work. Turn the mari so the south pole pin is facing up (continue rotating the mari with each stitch). Take a stitch with the same size and placement. Continue in this manner until the spindle is the desired size. And - once the spindle is established (usually after about three or four rows), you can safely remove the keeper pins as you continue to work. |
 |
Once the spindle is established (usually after about three or
four rows), you can safely remove the keeper pins as you
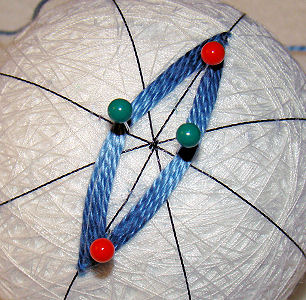
continue to work. How the keeper pins are placed will determine the size and shape of the final spindle. Pins placed farther away from each other will result in a longer, narrower final result. Pins placed closer to each other will give a shorter, wider spindle. It can require a bit more care to keep threads in place as the spindles become wider, and usually needs a little adjusting on stitching tension. While most stitchers are used to working around marking lines, it's perfectly fine to stitch off the grid, albeit it takes a little more attention to stitch placement. However, different angles and alignments can be accomplished in this manner. |
 |
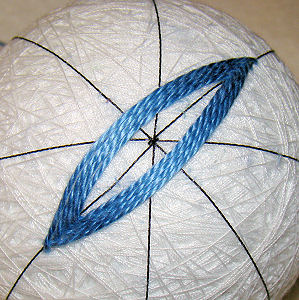 A variation is working the spindle with an open center, depending on the design being worked. Add keeper pins to hold the center of the spindle open while the first rows are established. Depending on the size of the spindle you may need to keep the side pins in place until you work other parts of the design to hold the spindle outline in place. |
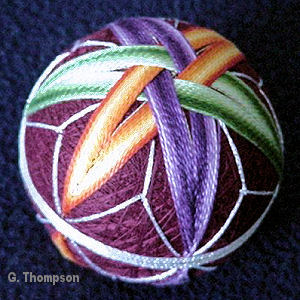 |
Tsumu kagari lends itself nicely to various styles and
applications. This example is Tsumu Kagari, Nejiri style
(interlocked) |
This
is a TemariKai.com Printable Page; © 2014, all rights reserved.
Right click to print one copy for personal use.
Last updated 11/2015 © 1998 - 2015 G. Thompson/PuffinStuff, Inc.
