
TemariKai ToolKit - Matsuba Kagari 松 葉かがり
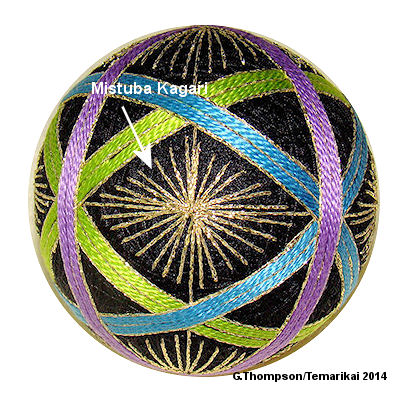
Matsuba translates to pine. Matsuba kagari are straight stitches. The usually radiate from a center point - houshajyo style - in a star-burst or spray-like bundle with a center tie, or in partial arrays originating from a base point. They are
 commonly used as embellishment in design, but can also stand alone as
the main element of a pattern.
commonly used as embellishment in design, but can also stand alone as
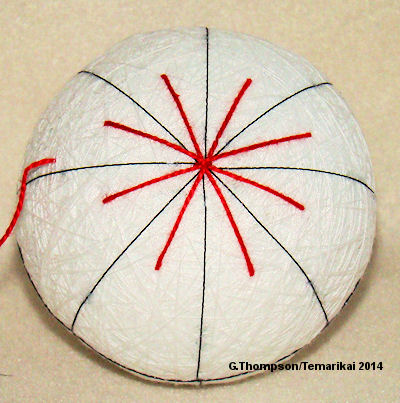
the main element of a pattern.Matsuba kagari are often seen as symmetric bundles, as though a handful of pine needles had been tied in the middle. They are often referred to as star bursts. This, however, is not a requirement for the stitch. They may be short, forming a small embellishment over a marking line intersection for example, or much longer creating a much larger impact within the design. They may originate from a single point without a mirror image, or in other arrangements. It is important that they be clean and crisp in their appearance. It can be very tempting to use the "shortest distance between two points" when applying matsuba kagari, but this will not yield straight stitches in the end. Tacking the center also requires attention to detail.
|
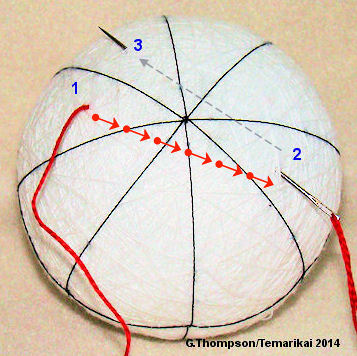
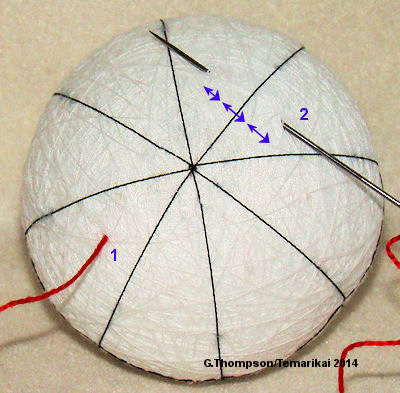
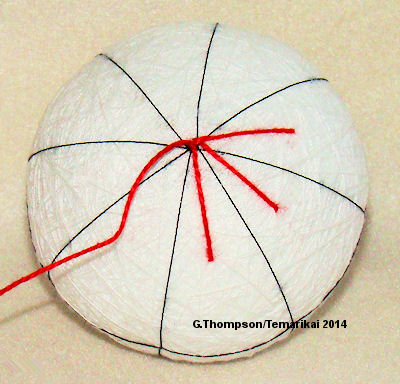
Secure a working thread at Point 1. Carry the thread to the end of the stitch, enter the thread. Carry the thread under the mari wrap to the beginning of the next stitch (Point 3), bring the thread through. |
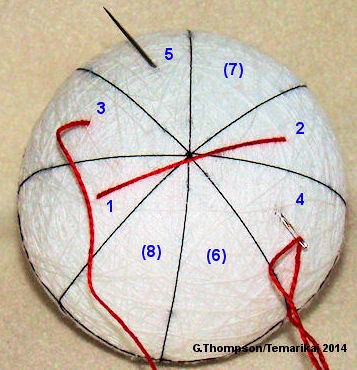 |
Carry the thread across to the end of this stitch at Point 4. Enter the thread, pass it under the mari wrap and come up at Point 5, the next stitch. Repeat this process around the area until completing the last 7-8 stitch. When working matsuba, the needle should always be working back and forth, on close to a 180° angle - almost a straight line, and the thread follows it. |
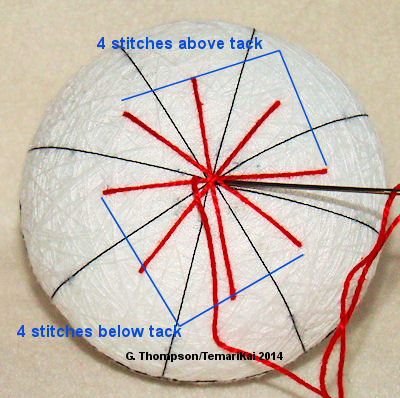 |
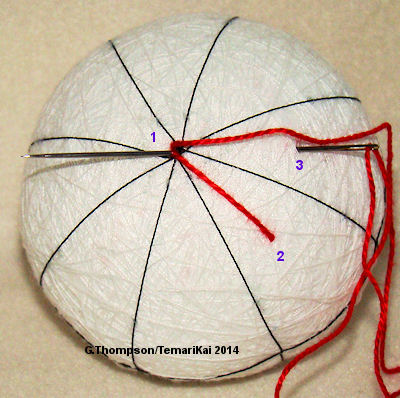
 On the last row, tack the center. The the stitches must be evenly distributed above and below the needle for a clean, crisp finish. Notice in the photo to left that there are 4 stitches above the needle (and therefore tack stitch) and 4 below the needle/stitch. Complete the tacks stitch and exit the thread. |
 |
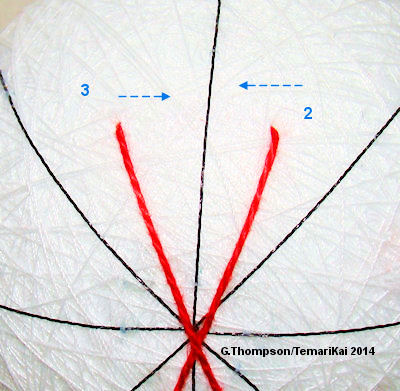 As stated above, the stitch angle should be close to 180°. This gives crisp, straight ends to the threads as shown in the finished example. Don't simply step over to the next adjacent stitch position, as it will affect the lay of the threads. Note the needle angle is almost 90° in the example to the left. Both threads from insertion at Point 2 and where it exits at Point 3 show slight curves in the directions of the arrows. |
 |
 The concept is the same if working half or partial stitches. The same stitching path must be followed. Work from Point 1 to each other outer point and back to 1. Take care to keep the center at 1 neat and clean. |
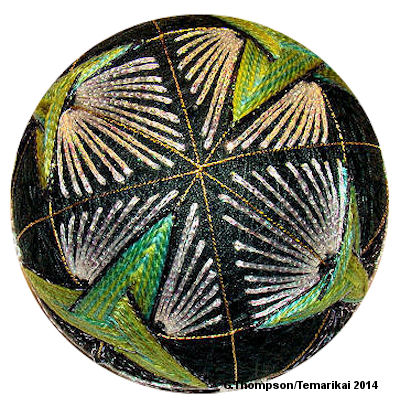 |
This example shows matsuba kagari being used as an integral part of the design rather than embellishment, and using half-stitches. |
This
is a TemariKai.com Printable Page; © 2014, all rights reserved.
Right click to print one copy for personal use.
Last updated 11/2015 © 1998 - 2014 G. Thompson/PuffinStuff, Inc.